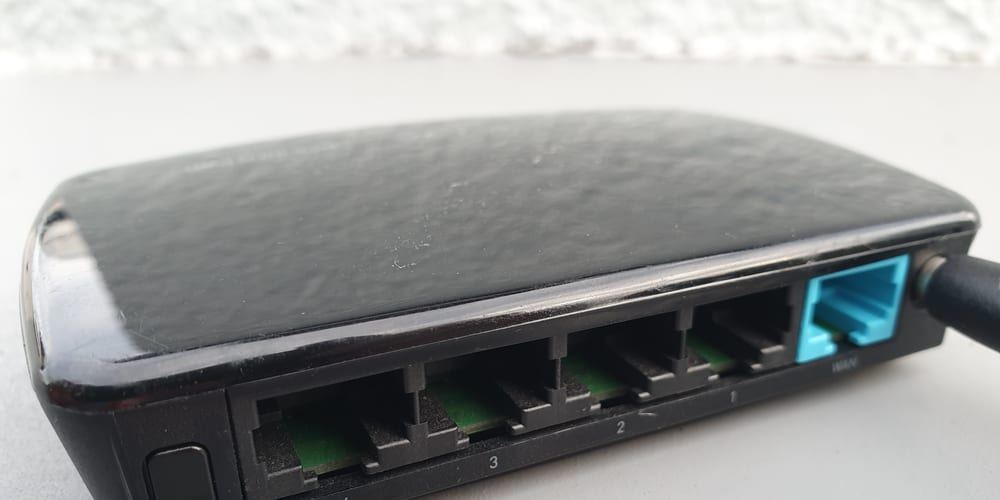
Photo: a home Wi-Fi router, its four LAN sockets and WAN socket facing the camera. ELECOM WRC-300FEBK WPS WiFi router.jpg by Syced, CC0.
The router IP in Windows is the value on the line labelled Default Gateway, and one command prints it in under a second. On the machine I worked on, Windows 11 Home 25H2, build 26200.9278, that value was 192.168.0.1. Five places in Windows will hand you the same number.
Five ways to read the router IP in Windows 11
Pick by what you already have open.
- Terminal. Press Win, type
cmd, runipconfig. Read the lineDefault Gateway. Microsoft documents the behaviour: used without parameters, ipconfig displays IPv4 and IPv6 addresses, subnet mask, and default gateway for all adapters. - PowerShell, one line.
Get-NetRoute -DestinationPrefix 0.0.0.0/0prints the gateway underNextHop. This is the one I reach for. Plainipconfigprinted four adapters on my laptop and three of them were disconnected, so the number I wanted sat in the fourth block.Get-NetRoutefiltered to the default route answered with a single row. - Settings. Network & internet, then Advanced network settings, then Hardware and connection properties. The gateway is on the IPv4 default gateway row of the adapter that is connected.
- netsh.
netsh interface ip show configlabels itDefault Gateway, with the gateway metric on the next line. It prints a block per adapter like ipconfig does, but it drops theDefault Gatewayline entirely from adapters that have none, so the line appearing at all tells you which adapter is carrying your traffic. - Control Panel. Press Win+R, run
ncpa.cpl, double-click your adapter, then Details in the status window. The gateway is on the rowIPv4 Default Gateway. That string still ships in Windows 11: it lives innetshell.dll, the library behind the old Network Connections window.
If you write down only one, take the second. It gives you one number and no reading.
Where Settings keeps the router IP in Windows 11
A pile of guides state that Settings does not show the gateway. It does. The row is four levels down, under a heading about hardware rather than about your connection, which is why browsing the app never lands on it.
Microsoft’s own support page for this task is a large part of why the claim spread. Find your IP address in Windows walks you to Network & internet, then Wi-Fi or Ethernet, and tells you to look next to IPv4 address. It never sends you to Hardware and connection properties, and the word Gateway appears on that page in one context only: the boxes you fill in when typing a static address by hand.
The page Microsoft does not point at dumps every adapter at once. On my laptop that was four blocks of properties, and only the Wi-Fi block carried a gateway. It is the slowest of the five routes and the only one that needs no typing, which is a fair trade if you are reading the number to someone over the phone.
One caveat on the label. I read that screen on an install running a non-English display language, so the row name you see is your language’s rendering of IPv4 Default Gateway. The value beside it is the same either way.
Why the old Network and Sharing Center advice sends you nowhere
Guides written for Windows 7 send you through the network icon to Network and Sharing Center, then to Local Area Connection. The destination survives. I listed the Control Panel items on this build and it is there, under the canonical name Microsoft.NetworkAndSharingCenter. What changed is everything around it.
The adapter name is the sharper problem. Those guides tell you to open Local Area Connection, and on this laptop ipconfig does print Local Area Connection* 1 and Local Area Connection* 2. Neither is your network card. Both are Wi-Fi Direct virtual adapters, both were disconnected, and neither has a gateway to show. The adapter holding the number was called WiFi. Following a name out of a 2010 guide puts you on an empty entry and convinces you the setting is gone.
When the address opens nothing in the browser
You have the number, you type it, and the browser gives you a search results page or a timeout. Four things fix most of that, and TP-Link documents all of them for its own hardware:
- Type the address into the address bar, not the search bar. A search engine will not take you to the login page.
- Turn off any VPN or proxy. They route local addresses away from the local network.
- Try a cable if you are on Wi-Fi, and try a second browser or a second device.
- Try the vendor’s hostname instead of the number. TP-Link publishes
tplinkwifi.net; ASUS publisheshttp://www.asusrouter.comalongside a LAN address such ashttp://192.168.50.1.
When the page opens but the login is refused
This is the wall people hit, and it is worth knowing before you start guessing that admin and admin will work.
Router vendors moved off shared defaults years ago. ASUS says the default username and password are admin on some models, and on others they are printed on a sticker on the back or bottom of the unit. Check the physical label before you try anything else.
If the label password is refused, or the label is gone, the honest answer is unpleasant. TP-Link states it plainly for its own routers: a factory reset is the only way back in, and there is no way to recover or look up a lost password. The reset is a button held for about ten seconds with the router powered on. ASUS gives at least five seconds on its hardware, until the power LED flashes.
Know what that button costs. TP-Link’s wording is that a reset erases all your custom settings, including your internet settings, Wi-Fi settings, and admin password. Your Wi-Fi name and password go with it, every device in the house drops off the network, and if your provider configured the connection for you, that configuration goes too. On a router your provider supplied, I would call them before pressing anything.
Sources
- Microsoft, Find your IP address in Windows
- Microsoft Learn, ipconfig
- Microsoft Learn, Get-NetRoute
- TP-Link, What can I do if I forget the login password of the TP-Link Wireless Router
- TP-Link, How to log in to the web management page of the router
- ASUS, How do I enter my ASUS router’s setting page using Web GUI
- How to Change the Revo Uninstaller Language in Version 2
- What the Revo Junk Files Cleaner Skips, and Why It Does
- Download Images and GIFs From Pinterest: Two Objects
- Multiple Instagram Accounts: Add One, or Create a New One
- How to Make a Spotify Playlist Private and Public Again
- Four Ways to Share a Spotify Playlist and When to Use Each